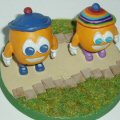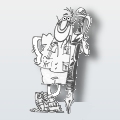
The Milkshake 3D creator program is quite good & even after the 30 day demo time it's only $25. Pat mentioned that it's not all that easy to create 3D models & even the basics I'm just coming to grips with but as you can see in my doodles below, there's a vast array of possibilities even with the most basic of shapes & a bit of skinning ^ ^
Just for reference again
Milkshape proggy >>> http://www.swissquake.ch/chumbalum-soft/
and this was handy as far as the skinning goes
http://www.psionic3d.co.uk/tutorials.html
(see the references to building & skinning a house)
If anyone else has any better links to tutorials feel free to add them - I haven't looked too far as yet...
I had mentioned about Pat's reference to making squares 'walkable' or not and a lot of the following ideas assume that our 3D creations can be made to be walk-through-able or otherwise.
I don't know if you've got 5 seconds Pat just to confirm that?
Any way - I've broken this up into 3 separate posts to fit in all the doodles.
This page shows some alternative options for Teleporters & Bridges
TELEPORTERS
Placed over a teleporter square & made walkable
* Stairs - a number of people have used 'multiple floors' in their creations, why not use stairs - these are just basic but you could build a circular staircase, ladder etc
* Stargate or Dr Who's Tardis
* Wells - with different coloured water
* Arrows which might be all the same colour that point in the direction of the corresponding teleporter.
(all these models could have - like the well - variations in colour to correspond to the different teleporters)
BRIDGES
* Fixed Use
* Limited Use - simply leave a hole in the bottom of the model so that when the bridge is finished it's use, the hole becomes visible & you can see that it don't work no more