[size=0]so mynameiskooky doesn't understand jokes. Bother.[/size]
OK.
NES Super Mario Brothers
-
MyNameIsKooky

- Rainbow Spirit Master
- Posts: 9711
- Joined: Mon Dec 01, 2008 10:18 pm
-
DEEMAN223344

- Rainbow MegaStar
- Posts: 3145
- Joined: Tue Dec 04, 2007 8:07 pm
-
DEEMAN223344
- Rainbow MegaStar
- Posts: 3145
- Joined: Tue Dec 04, 2007 8:07 pm

I just hex-edited my ROM; the Mario sprite spazzed, and the music started going really fast. I attached it here in ogg format.
I actually think it sounds better than the original. The faster tempo makes this music livelier, and the pitch shift makes everything better.
I actually think it sounds better than the original. The faster tempo makes this music livelier, and the pitch shift makes everything better.
You do not have the required permissions to view the files attached to this post.
-
MyNameIsKooky
- Rainbow Spirit Master
- Posts: 9711
- Joined: Mon Dec 01, 2008 10:18 pm
I don't even remember. I just remember randomly putting the string "THIS IS SPARTA" somewhere. EDIT: Oh, and also putting in random letters. Lots of them.
I just hex-edited it again and got these two...
After turning all 25h to 33h, the game shows this at startup:
And then, after turning all 33h to 29h, I get this at startup:
I just hex-edited it again and got these two...
After turning all 25h to 33h, the game shows this at startup:
And then, after turning all 33h to 29h, I get this at startup:
-
MyNameIsKooky
- Rainbow Spirit Master
- Posts: 9711
- Joined: Mon Dec 01, 2008 10:18 pm
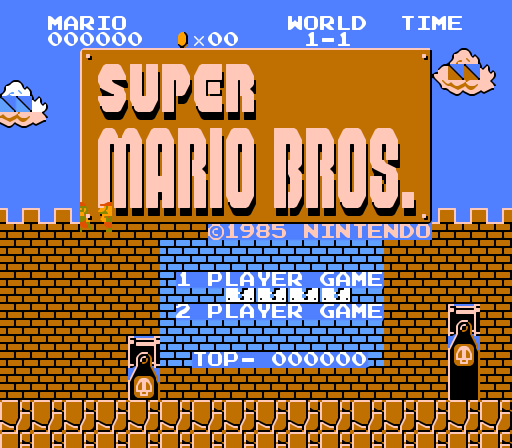
1st picture: Since 25 is the ID for the start of the game, World 1-1, it got changed to 33. The Area also got tuned somehow(?). Sprites also got messed up.
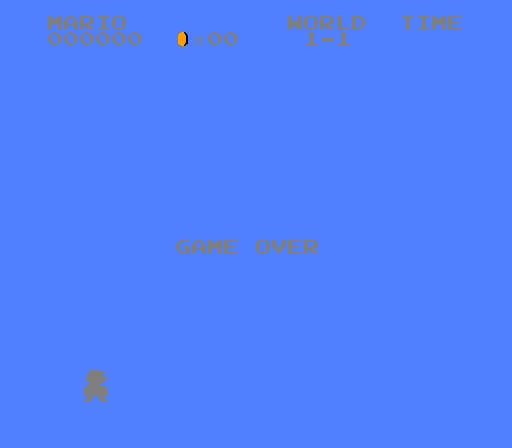
2nd picture: I've seen that silhouette effect before as well as playing on various screens, but...
Here's my notes on the Super Mario Bros. ROM address up to $1D74 if anyone's interested:
$0-$F: ROM Header.
$10-$5DE: Various internal functions such as graphics filters and startup functions, most of which don't seem to do anything. $CF is an interesting address to try for screwing around with graphics. $E9 also has some interesting effects on palletes and text reading, set it to 02 for example for some nice glowing palletes.
$5DF: Background pallete for Underwater.
$5E0: Background pallete for Overworld.
$5E1: Background pallete for Underworld.
$5E2: Background pallete for Castles.
$5E3: Background pallete for Nighttime.
$5E4: Background pallete for Snow.
$5E5: Background pallete for Winter Nights.
$5E6: Background pallete for 6-3.
$5E7: Background pallete for Sky.
$5E8: Pallete of Mario's hat and outer clothing.
$5E9: Pallete of Mario's skin.
$5EA: Pallete of Mario's hair and inner clothing.
$5EC: Pallete of Luigi's hat and outer clothing.
$5ED: Pallete of Luigi's skin.
$5EE: Pallete of Luigi's hair and inner clothing.
$5F0: Pallete of Fire Mario/Luigi's hat and outer clothing.
$5F1: Pallete of Fire Mario/Luigi's skin.
$5F2: Pallete of Fire Mario/Luigi's hair and inner clothing.
$5F3-$764: Bizarre graphics and pallete filters.
$765-$769: "MARIO" on HUD.
$76D-$771: "WORLD" on HUD.
$774-$777: "TIME" on HUD.
$77E-$77F: "x00" on HUD.
$780-$78B: Internal HUD functions.
$78C-$792: " x " on Level Transition.
$793: Internal HUD function.
$794: How far from the left side of the screen "WORLD X-X" is translated on Level Transition.
$795: How many characters are read for "WORLD X-X" on Level Transition. Sometimes strange side effects may occur if the limit is set too far.
$796-$79E: "WORLD - " on Level Transition.
$79F-$7B2: Internal Level Trasition functions.
$7B3-$7B9: "TIME UP" on Time-Up.
$7BA-$7C5: Internal Time-Up functions.
$7C6-$7CE: "GAME OVER" on Game Over.
$7CF-$7D2: "Internal Game Over functions.
$7D3-$7E7: "WELCOME TO THE WARP ZONE!"
$7E8-$7FC: Warp Zone internal functions.
$7FD-$801: "LUIGI" on HUD.
$802-$9D2: Bizarre graphics and pallete filters.
$9D3-$9D8: Orange flashing pallete cycle.
$9D9-$9DA: Controls which things flash.
$9DB: Some metamorphic color thing. Try 11, it's epic!
$9DC-$A48: Bizarre graphics and pallete filters.
$A49: Tile ID of the 16x16 tile in the top left corner of a brick that's been hit.
$A4A: Tile ID of the 16x16 tile in the top right corner of a brick that's been hit.
$A4B: Tile ID of the 16x16 tile in the bottom left corner of a brick that's been hit.
$A4C: Tile ID of the 16x16 tile in the bottom right corner of a brick that's been hit.
$A4D: Tile ID of the 16x16 tile in the top left corner of a frameworkd brick that's been hit.
$A4E: Tile ID of the 16x16 tile in the top right corner of a framework brick that's been hit.
$A4F: Tile ID of the 16x16 tile in the bottom left corner of a framework brick that's been hit.
$A50: Tile ID of the 16x16 tile in the bottom right corner of a framework brick that's been hit.
$A51: Tile ID of the 16x16 tile in the top left corner of a Metal Block.
$A52: Tile ID of the 16x16 tile in the top right corner of a Metal Block.
$A53: Tile ID of the 16x16 tile in the bottom left corner of a Metal Block.
$A54: Tile ID of the 16x16 tile in the bottom right corner of a Metal Block.
$A55: Tile ID of the 16x16 tile in the top left corner of where a Brick broke.
$A56: Tile ID of the 16x16 tile in the top right corner of where a Brick broke.
$A57: Tile ID of the 16x16 tile in the bottom left corner of where a Brick broke.
$A58: Tile ID of the 16x16 tile in the bottom right corner of where a Brick broke.
$A59-$A5C: 16x16 tile formation for Scroll Stops. CAN CRASH GAME IF CHANGED!
$A5D: Determines whether a Coin disappears if a Brick is broken under it or not. If the Brick is hit, the Coin will still be visible, but not collectable.
$A5E: Coins will not disappear when collected and the game will switch to Anthropomorphic Mode.
$A5F-$A60: Determines what Coins may be replaced with when collected.
$A61-$B1F: More internal Coin functions.
$B20: Tile ID of the 16x16 tile in the top left corner of null.
$B21: Tile ID of the 16x16 tile in the bottom left corner of null.
$B22: Tile ID of the 16x16 tile in the top right corner of null.
$B23: Tile ID of the 16x16 tile in the bottom right corner of null.
$B28-$B2B: 16x16 Tile ID's of leftmost bush piece. These are in the same order as above.
$B2C-$B2F: 16x16 Tile ID's of centermost bush piece.
$B30-$B33: 16x16 Tile ID's of rightmost bush piece.
$B34-$B37: 16x16 Tile ID's of left mountain slope.
$B38-$B3B: 16x16 Tile ID's of lefthand part of inside mountain.
$B3C-$B3F: 16x16 Tile ID's of mountain peak.
$B40-$B43: 16x16 Tile ID's of right mountain slope.
$B44-$B47: 16x16 Tile ID's of righthand part of inside mountain.
$B48-$B4B: 16x16 Tile ID's of centermost part of inside mountain.
$B4C-$BBB: 16x16 Tile ID's for Overworld that I'm too lazy to document.
$BBC-$C73: 16x16 Tile ID's for Underworld that I'm too lazy to document.
$C74-$C9B: 16x16 Tile ID's for Underwater that I'm too lazy to document.
$C9C-$CB3: 16x16 Tile ID's for Castles that I'm too lazy to document.
$CB7-$CBA: Pallete for Seaweed and Entrance Pipe in the Underwater part of 8-4. All of these next addresses are for Underwater areas until I mention otherwise.
$CBB-$CBE: Pallete for ocean floor, pipes and brickwork in the Underwater part of 8-4.
$CBF-$CC2: Water and HUD pallete.
$CC3-$CC6: Flashing orange pallete.
$CC7-$CCA: Underwater player pallete.
$CCB-$CCE: Green Cheep-Cheep pallete.
$CCF-$CD2: Pallete for bubbles, fireballs, lifts, and Red Cheep-Cheeps.
$CD3-$CD6: Blooper pallete.
$CDB-$CDE: Pallete for bushes, mountains, pipes, flagpole, trees and Cheep-Cheep Bridge Rails. As you've figured, we're in the Overworld palletes now.
$CDF-$CE2: Pallete for Title Screen, Bricks, Metal Blocks, Blocks, Castles, Fencing, Trees, Cheep-Cheep Bridge Platforms, Mushroom Platforms, and Bullet Bill Shooters.
$CE3-$CE6: Pallete for HUD, Clouds and Water.
$CE7-$CEA: Flashing orange pallete.
$CEB-$CEE: Overworld player pallete.
$CEF-$CF2: Pallete for 1-Up Mushrooms, Flags, Piranha Plants, Green Koopas, Fireflower Stems, Beanstalks, Hammer Bros. and Lakitu.
$CF3-$CF6: Pallete for Mushrooms, Point Values, Coins from Blocks, Lifts, Castle Flag, Red Koopas, Jumpspring, Cloud Platforms, Flying Cheep-Cheeps, Spinies and their eggs and Fireballs.
$CFF-$D02: Pipe pallete. We're in the Underworld palletes now.
$D03-$D06: Blocks and Bricks pallete.
$D07-$D0A: Pallete for Level Transition (for the entire game) and HUD.
$D0B-$D0E: Flashing orange pallete.
$D0F-$D12: Underground player pallete.
$D13-$D16: Pallete for 1-Up Mushroom, Piranha Plants, Green Koopas, Fireflower Stems and ? Blocks that are being hit.
$D17-$D1A: Pallete for Fireballs, Point Values, Coins from Blocks, Red Koopas, and Lifts.
$D1B-$D1E: Pallete for Goombas, Buzzy Beetles, Brick Fragments, and Bricks that are being hit.
$D23-$D26: Pallete for Chain, "Thank You Mario" text and Mushroom Platform tops. We're at the Castle palletes now.
$D27-$D2A: Pallete for Shattering Bricks, Metal Blocks, and Mushroom Platform Stalks.
$D2B-$D2E: Pallete for HUD, Lava, Bowser's Bridge, and Clouds.
$D2F-$D32: Flashing orange pallete.
$D33-$D36: Pallete for player in Castles.
$D37-$D3A: Pallete for Blocks that are being hit, Fireflower Stems, Piranha Plants, Green Koopas and Hammer Bros..
$D38-$D3E: Pallete for Fireballs, Fire Bars, Podoboos, Bowser's Flame, Coins from Blocks, Lifts, Toads, Flying Cheep-Cheep and Princess Peach.
$D3F-$D42: Pallete for Goombas, Buzzy Beetles, and Hammers.
$D47-$D4A: Snow pallete for Trees, Pipes and Flagpole.
$D4F-$D52: Nighttime pallete for Trees, Pipes, Cheep-Cheep Bridge Railing and Flagpole.
$D57-$D5A: Pallete for Mushroom Platform tops and Flagpoles.
$D5F-$D62: Bowser's pallete. Well, this wraps up the palletes!
$D63-$1306: Random internal functions relating to HUD and transitions.
$1307: Background type for nothing.
$1308: Background type for mountains and bushes.
$1309: Background type for trees and fences.
$130A: Background type for glitch beyond level data.
$130B-$1337: Background design for clouds on nothing background.
$1338-$13E7: More background designs.
$13E8: What tile is used for Underwater ground.
$13E9: What tile is used for Overworld ground.
$13EA: What tile is used for Framework Bricks.
$13EB: What tile is used for Castle Blocks.
$13EC-$13ED: Nothing formation type.
$13EE-$13EF: Ground(2) formation type.
$13F0-$13F1: Ground(2), ceiling(1) formation type.
$13F2-$13F3: Ground(2), ceiling(3) formation type.
$13F4-$13F5: Ground(2), ceiling(4) formation type.
$13F6-$13F7: Ground(2), ceiling(8) formation type.
$13F8-$13F9: Ground(5), ceiling(1) formation type.
$13FA-$13FB: Ground(5), ceiling(3) formation type.
$13FC-$13FD: Ground(5), ceiling(4) formation type.
$13FE-$13FF: Ground(6), ceiling(1) formation type.
$1400-$1401: Ceiling(1) formation type.
$1402-$1403: Ground(6), ceiling(4) formation type.
$1404-$1405: Ground(9), ceiling(1) formation type.
$1406-$1407: Ground(2), middle(5), ceiling(1) formation type.
$1408-$1409: Ground(2), middle(4), ceiling(1) formation type.
$140A-$140B: Ground(13) formation type.
$140C-$1416: Internal functions.
$1417: What tile is used for null.
$1418-$147C: How the game reads level and background data.
$147D-$1C03: Functions relating to backgrounds, level data and Framework.
$1C04: Function relating to the title screen.
$1C05-$1C12: Random functions that don't seem to do anything.
$1C13-$1C22: Weird pointers that signify Area ID and even level types beyond the usual 4 that tend to swap randomly on the title screen. It's pretty cool!
$1C23: Some Area ID thingy that tends to change randomly.
$1C24-$1C3B: Don't seem to do anything?
$1C3C-$1C40: Weird Area ID stuff.
$1C41-$1CC3: Enemy Layout ID stuff.
$1CC4-$1CCB: World Index
$1CCC-$1CEF: Area Indexes
$1CF0-$1D37: Enemy Layout Indexes
$1D38-$1D74: Layout Data Indexes

-
MyNameIsKooky
- Rainbow Spirit Master
- Posts: 9711
- Joined: Mon Dec 01, 2008 10:18 pm
-
MyNameIsKooky
- Rainbow Spirit Master
- Posts: 9711
- Joined: Mon Dec 01, 2008 10:18 pm
-
MyNameIsKooky
- Rainbow Spirit Master
- Posts: 9711
- Joined: Mon Dec 01, 2008 10:18 pm
-
MyNameIsKooky
- Rainbow Spirit Master
- Posts: 9711
- Joined: Mon Dec 01, 2008 10:18 pm
lol
Anyways, some proof that I had too much free time when working on my other notes. Here's about half of my notes, these all took about a few months to research:
---THE 128 AREAS---
Wait! Before we hop into complex stuff, let's examine the areas of Super Mario Brothers!
00: Underwater bonus.
01: 2-2/7-2.
02: 8-4 underwater section.
03: Underwater 3-3 with cool enemies.
04: Underwater 8-3 that freezes shortly after the beginning.
05: Underwater 4-1 with a few cool enemies.
06: 9-1.
07: Underwater 3-1.
08: Underwater 1-1.
09: Fantastic underwater 1-3 with cool enemies!
0A: Underwater 2-3/7-3.
0B: Underwater 2-1 with cool enemies.
0C: Underwater pipe entry.
0D: Underwater 5-1 with cool enemies.
0E: 50-E.
0F: 59-1.
10: 69-1.
11: Underwater 6-1.
12: Underwater 5-2 Warp Zone Time-Up.
13: Underwater 8-1 where the screen shakes violently.
14: Underwater 5-2.
15: Underwater 8-2.
16: Underwater 7-1 with cool enemies.
17: Underwater nighttime cloud bonus Time-Up.
18: Underwater 3-1.
19: Underwater 1-2 with cool enemies.
1A: Fantastic underwater 4-2 with cool enemies! This area features a Flickerer!
1B: Underwater coin bonus.
1C: C-1.
1D: Underwater 4-4 with no loops.
1E: Underwater 2-4/5-4.
1F: D-1.
20: 3-3.
21: 8-3.
22: 4-1.
23: 6-2.
24: 3-1.
25: 1-1.
26: 1-3.
27: 2-3/7-3.
28: 2-1.
29: Pipe entry.
2A: 5-1.
2B: Cloud bonus.
2C: 4-3.
2D: 6-3.
2E: 6-1.
2F: 5-2's Warp Zone.
30: 8-1.
31: 5-2.
32: 8-2.
33: 7-1.
34: Cloud bonus.
35: 3-1.
36: Overground 1-2.
37: Overground 4-2.
38: Fantastic overground coin bonus!
39: Fantastic overground 1-4/6-4! There are Bloopers and vertical lifts!
3A: Fantastic overground 4-4 with Bloopers and no loops!
3B: 65-2!
3C: K-1!
3D: Fantastic overground 7-4 with cool enemies! The first gap might be difficult to clear!
3E: Fantastic overground 8-4 with RAM enemies! (RAM enemies means that the enemies are random since they are being read from part of the ROM that contains RAM!)
3F: 52-1.
40: 1-2.
41: 4-2.
42: Underground coin bonus.
43: Underground Area 39.
44: Underground Area 3A.
45: Underground Area 3B.
46: Fantastic Underground Area 3C!
47: Underground Area 3D.
48: Fantastic Underground Area 3E!
49: 65-2.
4A: Underground Double Cloud Corridor Trap. This Area can be quite interesting if you use a cheat or something to play it.
4B: Underground 137-1.
4C: Blackout screen.
4D: Crashes upon entry, but playable if you use cheats to get in or something.
4E: Blackout screen.
4F: Underground RAM Area Time-Up.
50: T-1!
51: Blackout screen.
52: Blackout screen.
53: Underground RAM Area Time-Up.
54: Underground 62-1.
55: Mario automatically walks in the ground under an underground hallway. The game freezes when Mario is about to touch a mushroom platform part.
56: Blackout screen.
57: Underground RAM Area.
58: 127-1.
59: W-1.
5A: Blackout screen.
5B: Underground RAM Area Time-Up.
5C: Underground Hallway Trap with a rope.
5D: Blackout screen.
5E: Blackout screen.
5F: S-2.
60: 1-4/6-4.
61: 4-4.
62: 2-4/5-4.
63: 3-4.
64: 7-4.
65: 8-4.
66: 65-2.
67: Castle Area 4A.
68: Castle 137-1.
69: Blackout screen.
6A: Castle Area 4D.
6B: Blackout screen.
6C: Castle Area 4F.
6D: Castle T-1!
6E: Blackout screen.
6F: Blackout screen.
70: Castle Area 53.
71: 62-1.
72: Castle Area 55.
73: Blackout screen.
74: Castle Area 57.
75: Castle 127-1!
76: 51-5.
77: Blackout screen.
78: Castle Area 5B.
79: Castle Area 5C.
7A: Blackout screen.
7B: Blackout screen.
7C: Castle S-2.
7D: Castle RAM Area Time-Up.
7E: Huge Cross Castle.
7F: Blackout screen. After this Area, the above Areas repeat. Now let's learn about World Codes!
---256 WORLD CODES---
World Codes specify which Areas should be played. Note that some World Codes may alter the enemy data of some of the Areas.
00: 1-1 > 1-2 > 1-3 > 1-4
01: 1-2 > 1-3 > 1-4
02: 1-2 > 1-3 > 1-4
03: 1-3 > 1-4
04: 1-4
05: 2-1 > 2-2 > 2-3 > 2-4
06: 2-2 > 2-3 > 2-4
07: 2-2 > 2-3 > 2-4
08: 2-3 > 2-4
09: 2-4
0A: 3-1 > 3-2 > 3-3 > 3-4
0B: 3-2 > 3-3 > 3-4
0C: 3-3 > 3-4
0D: 3-4
0E: 4-1 > 4-2 > 4-3 > 4-4
0F: 4-2 > 4-3 > 4-4
10: 4-2 > 4-3 > 4-4
11: 4-3 > 4-4
12: 4-4
13: 5-1 > 5-2 > 5-3 > 5-4
14: 5-2 > 5-3 > 5-4
15: 5-3 > 5-4
16: 5-4
17: 6-1 > 6-2 > 6-3 > 6-4
18: 6-2 > 6-3 > 6-4
19: 6-3 > 6-4
1A: 6-4
1B: 7-1 > 7-2 > 7-3 > 7-4
1C: 7-2 > 7-3 > 7-4
1D: 7-2 > 7-3 > 7-4
1E: 7-3 > 7-4
1F: 7-4
20: 8-1 > 8-2 > 8-3 > 8-4
21: 8-2 > 8-3 > 8-4
22: 8-3 > 8-4
23: 8-4
24: D-1
25: 9-1 > 9-2
26: 9-2
27: H-1
28: E-1
29: A-1
2A: S-1 > S-2
2B: S-2
2C: Q-1 > D-1
2D: D-1
2E: W-1
2F: Area 7E
30: x-1
31: T-1
32: T-1
33: -1
34: D-1
35: K-1
36: Blackout screen
37: Blackout screen
38: Area 7C
39: 3-3 > Pipe entry > Blackout screen
3A: Pipe entry > Blackout screen
3B: Blackout screen
3C: 62-1
3D: Blackout screen
3E: Blackout screen
3F: 3-2 > 1-4
40: 1-4
41: 50-E
42: 5-1 > 8-2 > 127-1
43: 8-2 > 127-1
44: 127-1
45: Area 05 > 8-3 > 1-4
46: 8-3 > 1-4
47: 1-4
48: 62-1
49: x-1
4A: Area 1D
4B: Area 1D
4C: Area 1D
4D: Area 1D
4E: Area 1E
4F: Area 1E
50: Area 1E
51: Area 1E
52: Area 1E
53: Area 1E
54: Area 1E
55: Area 1E
56: Area 1E
57: Area 1E
58: Area 1E
59: Area 1E
5A: Area 1E
5B: Area 1E
5C: Area 1E
5D: Area 1E
5E: Area 1E
5F: Area 1E
60: Area 1E
61: 3-3 > 3-3 > 3-3 > 3-3 > 3-3 > 3-3 > 8-3 > 8-3 > 8-3 > 8-3 > 8-3 > H-1
62: 3-3 > 3-3 > 3-3 > 3-3 > 3-3 > 8-3 > 8-3 > 8-3 > 8-3 > 8-3 > H-1
63: 3-3 > 3-3 > 3-3 > 3-3 > 8-3 > 8-3 > 8-3 > 8-3 > 8-3 > H-1
64: 3-3 > 3-3 > 3-3 > 8-3 > 8-3 > 8-3 > 8-3 > 8-3 > H-1
65: 3-3 > 3-3 > 8-3 > 8-3 > 8-3 > 8-3 > 8-3 > H-1
66: 3-3 > 8-3 > 8-3 > 8-3 > 8-3 > 8-3 > H-1
67: 8-3 > 8-3 > 8-3 > 8-3 > 8-3 > H-1
68: 8-3 > 8-3 > 8-3 > 8-3 > H-1
69: 8-3 > 8-3 > 8-3 > H-1
6A: 8-3 > 8-3 > H-1
6B: 8-3 > H-1
6C: H-1
6D: Area 03 > Area 19
6E: Area 19
6F: C-1
70: 9-1 > 81-1
71: 81-1
72: G-1
73: Blackout screen
74: Blackout screen
75: B-3
76: Q-1 > Area 19
77: Area 19
78: 50-E
79: Blackout screen
7A: Area 48
7B: 64-1
7C: 8-1 > 65-2
7D: 65-2
7E: Blackout screen
7F: 59-1 > 51-5
80: 51-5
81: Area 4F
82: Blackout screen
83: Blackout screen
84: Area 12
85: Area 05 > Area 7E
86: Area 7E
87: Area 57
88: 74-2
89: 3-2 > 127-1
8A: 127-1
8B: Area 5C
8C: 5-2 Warp Zone Time-Up
8D: 69-1 > 59-1 > 74-2
8E: 59-1 > 74-2
8F: 74-2
90: Blackout screen.
91: Blackout screen.
92: 6-1 > 6-1 > 6-1 > 3-1 > 3-1 > 48-1 > 48-1 > 1-3 > 1-3 > 1-3 > 3-3 > 3-3 > 2-1 > 2-1 > 2-1 > 2-1 > 2-1 > 50-D > 50-E
93: 6-1 > 6-1 > 3-1 > 3-1 > 48-1 > 48-1 > 1-3 > 1-3 > 1-3 > 3-3 > 3-3 > 2-1 > 2-1 > 2-1 >2-1 > 2-1 > 50-D > 50-E
94: 6-1 > 3-1 > 3-1 > 48-1 > 48-1 > 1-3 > 1-3 > 1-3 > 3-3 > 3-3 > 2-1 > 2-1 > 2-1 > 2-1 > 2-1 > 50-D > 50-E
95: 3-1 > 3-1 > 48-1 > 48-1 > 1-3 > 1-3 > 1-3 > 3-3 > 3-3 > 2-1 > 2-1 > 2-1 > 2-1 > 2-1 > 50-D > 50-E
96: 3-1 > 48-1 > 48-1 > 1-3 > 1-3 > 1-3 > 3-3 > 3-3 > 2-1 > 2-1 > 2-1 > 2-1 > 2-1 > 50-D > 50-E
97: 48-1 > 48-1 > 1-3 > 1-3 > 1-3 > 3-3 > 3-3 > 2-1 > 2-1 > 2-1 > 2-1 > 2-1 > 50-D > 50-E
98: 48-1 > 1-3 > 1-3 > 1-3 > 3-3 > 3-3 > 2-1 > 2-1 > 2-1 > 2-1 > 2-1 > 50-D > 50-E
99: 1-3 > 1-3 > 1-3 > 3-3 > 3-3 > 2-1 > 2-1 > 2-1 > 2-1 > 2-1 > 50-D > 50-E
9A: 1-3 > 1-3 > 3-3 > 3-3 > 2-1 > 2-1 > 2-1 > 2-1 > 2-1 > 50-D > 50-E
9B: 1-3 > 3-3 > 3-3 > 2-1 > 2-1 > 2-1 > 2-1 > 2-1 > 50-D > 50-E
9C: 3-3 > 3-3 > 2-1 > 2-1 > 2-1 > 2-1 > 2-1 > 50-D > 50-E
9D: 3-3 > 2-1 > 2-1 > 2-1 > 2-1 > 2-1 > 50-D > 50-E
9E: 2-1 > 2-1 > 2-1 > 2-1 > 2-1 > 50-D > 50-E
9F: 2-1 > 2-1 > 2-1 > 2-1 > 50-D > 50-E
A0: 2-1 > 2-1 > 2-1 > 50-D > 50-E
A1: 2-1 > 2-1 > 50-D > 50-E
A2: 2-1 > 50-D > 50-E
A3: 50-D > 50-E
A4: 50-D > 50-E
A5: 50-D > 50-E
A6: 50-D > 50-E
A7: 50-E
A8: 50-E
A9: 50-E
AA: 4-3 > 4-3 > 4-3 > 6-3 > 8-3 > 4-1 > 4-1 > 6-2 > 6-2 > 6-2 > 51-5
AB: 4-3 > 4-3 > 6-3 > 8-3 > 4-1 > 4-1 > 6-2 > 6-2 > 6-2 > 51-5
AC: 4-3 > 6-3 > 8-3 > 4-1 > 4-1 > 6-2 > 6-2 > 6-2 > 51-5
AD: 6-3 > 8-3 > 4-1 > 4-1 > 6-2 > 6-2 > 6-2 > 51-5
AE: 8-3 > 4-1 > 4-1 > 6-2 > 6-2 > 6-2 > 51-5
AF: 4-1 > 4-1 > 6-2 > 6-2 > 6-2 > 51-5
B0: 4-1 > 6-2 > 6-2 > 6-2 > 51-5
B1: 6-2 > 6-2 > 6-2 > 51-5
B2: 6-2 > 6-2 > 51-5
B3: 6-2 > 51-5
B4: 51-5
B5: Blackout screen
B6: 65-2
B7: Blackout screen
B8: 64-1
B9: Area 1D
BA: x-1
BB: Blackout screen
BC: Blackout screen
BD: Blackout screen
BE: Area 16 > Area 1D
BF: Area 1D
C0: B-1
C1: Area 1D
C2: B-3
C3: Area 1D
C4: 52-1
C5: Area 1D
C6: Area 04
C7: Area 53
C8: 52-1
C9: Area 1D
CA: Area 04
CB: x-1
CC: 52-1
CD: Blackout screen
CE: 59-2 > Area 15 > 59-1 > 59-2 > 8-1 > Blackout screen
CF: Area 15 > 59-1 > 59-2 > 8-1 > Blackout screen
D0: 59-1 > 59-2 > 8-1 > Blackout screen
D1: 59-2 > 8-1 > Blackout screen
D2: 8-1 > Blackout screen
D3: Blackout screen
D4: E-1
D5: 6-3 > 1-3 > 2-1 > 69-1 > 3-2 > Blackout screen
D6: 1-3 > 2-1 > 69-1 > 3-2 > Blackout screen
D7: 2-1 > 69-1 > 3-2 > Blackout screen
D8: 69-1 > 3-2 > Blackout screen
D9: 3-2 > Blackout screen
DA: Blackout screen
DB: 59-1 > Area 03 > Blackout screen
DC: Area 03 > Blackout screen
DD: Blackout screen
DE: x-1
DF: 52-1
E0: x-1
E1: 59-1 > Area 07 > B-3
E2: Area 07 > B-3
E3: B-3
E4: x-1
E5: 5-1 > x-1
E6: x-1
E7: Area 48
E8: Area 15 > 59-1 > Q-1 > 5-1 > x-1
E9: 59-1 > Q-1 > 5-1 > x-1
EA: Q-1 > 5-1 > x-1
EB: 5-1 > x-1
EC: x-1
ED: Area 5B
EE: Underwater Pipe Entry to World E-1
EF: World E-1
F0: 6-3 > 69-1 > 3-2 > Blackout screen
F1: 69-1 > 3-2 > Blackout screen
F2: 3-2 > Blackout screen
F3: Blackout screen
F4: Area 0B > Underwater pipe entry to 137-1
F5: Underwater Pipe Entry to 137-1
F6: 137-1
F7: Blackout screen
F8: Blackout screen
F9: S-2
FA: Blackout screen
FB: Underwater Pipe Entry to Area 3D
FC: Area 3D
FD: Area 5B
FE: Area 19
FF: Area 1D
---256 GROUND TYPES---
(Change number at $13E9)
00: Nothing
01: Blackness
02: Bush piece
03: Bush piece
04: Bush piece
05: Mountain piece
06: Mountain piece
07: Mountain piece
08: Mountain piece
09: Mountain piece
0A: Mountain piece
0B: Cheep-Cheep bridge piece
0C: Chains
0D: Tree piece
0E: Tree piece
0F: Tree piece
10: Pipe piece
11: Pipe piece
12: Pipe piece
13: Pipe piece
14: Pipe piece
15: Pipe piece
16: Island piece
17: Island piece
18: Island piece
19: Mushroom platform piece
1A: Mushroom platform piece
1B: Mushroom platform piece
1C: Pipe piece
1D: Pipe piece
1E: Pipe piece
1F: Pipe piece
20: Pipe piece
21: Pipe piece
22: Seaplant
23: Invisible solid block
24: Climbing sphere
25: Flagpole
26: Invisible climbing sphere
27: Vertical climbable rope that enemies can walk on
28: Horizontal climbable rope that enemies can walk on
29: Climbable rope lift part that enemies can walk on
2A: Climbable rope lift part that enemies can walk on
2B: Invisible climbing sphere (it seems that enemies can walk on all climbable things from now on)
2C: Climbable castle piece (Climbable things are greenish at the moment)
2D: Climbable castle piece
2E: Climbable castle piece
2F: Climbable castle piece
30: Climbable castle piece
31: Climbable castle piece
32: Climbable blackness
33: Climbable island piece
34: Climbable fence
35: Climbable tree piece
36: Climbable mushroom platform piece
37: Climbable mushroom platform piece
38: Climbable brick
39: Climbable rampart piece
3A: Climbable brick
3B: Green climbable ground
3C: Climbable brick
3D: Climbable brick
3E: Climbable brick
3F: Climbable brick
40: Vertical rope (Things have stopped being greenish and climbable for now)
41: Horizontal rope
42: Rope lift part
43: Rope lift part
44: Nothing
45: Castle piece
46: Castle piece
47: Castle piece
48: Castle piece
49: Castle piece
4A: Castle piece
4B: Blackness
4C: Island piece
4D: Fence
4E: Tree piece
4F: Mushroom platform piece
50: Mushroom platform piece
51: Brick
52: Framework brick
53: Brick that turns into a breakable used block if Mario is not big
54: Ground
55: Brick that contains a mushroom
56: Brick that contains a beanstalk
57: Brick that contains a star
58: Brick that contains multiple coins
59: Brick that contains a 1-Up Mushroom
5A: Brick that contains a mushroom
5B: Brick that contains a beanstalk
5C: Brick that contains a star
5D: Brick that contains multiple coins
5E: Brick that contains a 1-Up Mushroom
5F: Invisible coin block
60: Invisible 1-Up Mushroom block
61: Block
62: Castle ground
63: Cheep-Cheep bridge without ropes
64: Bullet Bill Shooter
65: Bullet Bill Shooter piece
66: Bullet Bill Shooter piece
67: Invisible ground that Mario cannot move or jump off of
68: Springboard piece that Mario cannot move or jump off of
69: Underwater ground
6A: Springboard piece
6B: Orange pipe piece
6C: Orange pipe piece
6D: Climbing sphere
6E: Climbable cloud piece (Climbable stuff that enemies can walk on again, except red this time)
6F: Climbable cloud piece
70: Climbable cloud piece
71: Climbable cloud piece
72: Climbable cloud piece
73: Climbable cloud piece
74: Climbable waves
75: Climbable liquid
76: Climbable cloud ground
77: Climbable Bowser's Bridge
78: Red climbable ? Block
79: Red climbable ? Block
7A: Red climbable coin
7B: Red climbable underwater coin
7C: Climbable Used Block
7D: Red climbable axe
7E: Red Metatile (Metatiles are tiles that are made of random stuff that don't really go together. Metatiles always act like vines that enemies can walk on.)
7F: Grey Metatile
80: Cloud piece (Things are back to normal now)
81: Cloud piece
82: Cloud piece
83: Cloud piece
84: Cloud piece
85: Cloud piece
86: Waves
87: Liquid
88: Cloud ground
89: Bowser's Bridge
8A: White climbable ? Block
8B: White climbable ? Block
8C: White climbable coin
8D: White underwater climbable coin
8E: Blue climbable Used Block
8F: White climbable axe
90: White Metatile
91: White Metatile
92: White Metatile
93: White Metatile
94: White and Black Metatile
95: White and Black Metatile
96: White and Black Metatile
97: White and Black Metatile
98: White Metatile
99: White Metatile
9A: White Metatile
9B: White Metatile
9C: White Metatile
9D: White and Black Metatile
9E: White and Black Metatile
9F: White and Black Metatile
A0: White and Black Metatile
A1: White Metatile
A2: White Metatile
A3: White Metatile
A4: White Metatile
A5: White Metatile
A6: White and Black Metatile
A7: White and Black Metatile
A8: White and Black Metatile
A9: White and Black Metatile
AA: White Metatile
AB: White Metatile
AC: White Metatile
AD: White Metatile
AE: White Metatile
AF: White and Black Metatile
B0: White and Black Metatile
B1: White Metatile
B2: White and Black Metatile
B3: White Metatile
B4: White Metatile
B5: White Metatile
B6: White Metatile
B7: White Metatile
B8: White Metatile
B9: White and Black Metatile
BA: White Metatile
BB: White and Black Metatile
BC: White Metatile
BD: White Metatile
BE: White Metatile
BF: White Metatile
C0: ? Block that contains a coin
C1: ? Block that contains a mushroom
C2: Coin
C3: Underwater coin
C4: Used Block
C5: Axe
C6-FF: Same as the above Metatiles, except flashing
---FRAMEWORK TYPES---
(Change number at $13EE)
Most of the Framework Types are similar and hard to describe and repeat a lot, so I won't go through any of it.
---1024 AREAS---
You've seen the 128 Areas above, yes? How would you like to see a whoppin' 1024 Areas? To explore all 1024 Areas you need a lot of SMB hacking experience. You should have enough experience after all of that stuff above. There are 256 Layout IDs that can be expressed in underwater, overground, underground or castle elements, making a total of 1024 different Areas. So I call this 1024 Areas.
Here's the format.
(AREA ID): (AREA NAME)
(TYPE OF 00 03 19 1C)-(INITIAL AREA): (ELEMENT)
00: Underwater Coin Bonus
00 00 00 00-00: Underwater
00 00 00 00-20: Overworld
00 00 00 00-40: Underground
00 00 00 00-60: Castle
01: 2-2 & 7-2
01 00 00 00-00: Underwater
00 01 00 00-20: Overworld
00 00 01 00-40: Underground
00 00 00 01-60: Castle
02: 8-4 Underwater Section
02 00 00 00-00: Underwater
00 02 00 00-20: Overworld
00 00 02 00-40: Underground
00 00 00 02-60: Castle
03: 3-3
03 00 00 00-00: Underwater
00 03 00 00-20: Overworld
00 00 03 00-40: Underground
00 00 00 03-60: Castle
04: 8-3
04 00 00 00-00: Underwater
00 04 00 00-20: Overworld
00 00 04 00-40: Underground
00 00 00 04-60: Castle
05: 4-1
05 00 00 00-00: Underwater
00 05 00 00-20: Overworld
00 00 05 00-40: Underground
00 00 00 05-60: Castle
06: 6-2
06 00 00 00-00: Underwater
00 06 00 00-20: Overworld
00 00 06 00-40: Underground
00 00 00 06-60: Castle
07: 3-1
07 00 00 00-00: Underwater
00 07 00 00-20: Overworld
00 00 07 00-40: Underground
00 00 00 07-60: Castle
08: 1-1
08 00 00 00-00: Underwater
00 08 00 00-20: Overworld
00 00 08 00-40: Underground
00 00 00 08-60: Castle
09: 1-3
09 00 00 00-00: Underwater
00 09 00 00-20: Overworld
00 00 09 00-40: Underground
00 00 00 09-60: Castle
0A: 2-3 & 7-3
0A 00 00 00-00: Underwater
00 0A 00 00-20: Overworld
00 00 0A 00-40: Underground
00 00 00 0A-60: Castle
0B: 2-1
0B 00 00 00-00: Underwater
00 0B 00 00-20: Overworld
00 00 0B 00-40: Underground
00 00 00 0B-60: Castle
0C: Pipe Entry
0C 00 00 00-00: Underwater
00 0C 00 00-20: Overworld
00 00 0C 00-40: Underground
00 00 00 0C-60: Castle
0D: 5-1
0D 00 00 00-00: Underwater
00 0D 00 00-20: Overworld
00 00 0D 00-40: Underground
00 00 00 0D-60: Castle
0E: Cloud Bonus
0E 00 00 00-00: Underwater
00 0E 00 00-20: Overworld
00 00 0E 00-40: Underground
00 00 00 0E-60: Castle
0F: 4-3
0F 00 00 00-00: Underwater
00 0F 00 00-20: Overworld
00 00 0F 00-40: Underground
00 00 00 0F-60: Castle
10: 6-3
10 00 00 00-00: Underwater
00 10 00 00-20: Overworld
00 00 10 00-40: Underground
00 00 00 10-60: Castle
11: 6-1
11 00 00 00-00: Underwater
00 11 00 00-20: Overworld
00 00 11 00-40: Underground
00 00 00 11-60: Castle
12: Warp Zone
12 00 00 00-00: Underwater
00 12 00 00-20: Overworld
00 00 12 00-40: Underground
00 00 00 12-60: Castle
13: 8-1
13 00 00 00-00: Underwater
00 13 00 00-20: Overworld
00 00 13 00-40: Underground
00 00 00 13-60: Castle
14: 5-2
14 00 00 00-00: Underwater
00 14 00 00-20: Overworld
00 00 14 00-40: Underground
00 00 00 14-60: Castle
15: 8-2
15 00 00 00-00: Underwater
00 15 00 00-20: Overworld
00 00 15 00-40: Underground
00 00 00 15-60: Castle
16: 7-1
16 00 00 00-00: Underwater
00 16 00 00-20: Overworld
00 00 16 00-40: Underground
00 00 00 16-60: Castle
17: Nighttime Cloud Bonus
17 00 00 00-00: Underwater
00 17 00 00-20: Overworld
00 00 17 00-40: Underground
00 00 00 17-60: Castle
18: 3-2
18 00 00 00-00: Underwater
00 18 00 00-20: Overworld
00 00 18 00-40: Underground
00 00 00 18-60: Castle
19: 1-2
19 00 00 00-00: Underwater
00 19 00 00-20: Overworld
00 00 19 00-40: Underground
00 00 00 19-60: Castle
1A: 4-2
1A 00 00 00-00: Underwater
00 1A 00 00-20: Overworld
00 00 1A 00-40: Underground
00 00 00 1A-60: Castle
1B: Coin Rooms
1B 00 00 00-00: Underwater
00 1B 00 00-20: Overworld
00 00 1B 00-40: Underground
00 00 00 1B-60: Castle
1C: 1-4 & 6-4
1C 00 00 00-00: Underwater
00 1C 00 00-20: Overworld
00 00 1C 00-40: Underground
00 00 00 1C-60: Castle
1D: 4-4
1D 00 00 00-00: Underwater
00 1D 00 00-20: Overworld
00 00 1D 00-40: Underground
00 00 00 1D-60: Castle
1E: 2-4 & 5-4
1E 00 00 00-00: Underwater
00 1E 00 00-20: Overworld
00 00 1E 00-40: Underground
00 00 00 1E-60: Castle
1F: 3-4
1F 00 00 00-00: Underwater
00 1F 00 00-20: Overworld
00 00 1F 00-40: Underground
00 00 00 1F-60: Castle
20: 7-4
20 00 00 00-00: Underwater
00 20 00 00-20: Overworld
00 00 20 00-40: Underground
00 00 00 20-60: Castle
21: 8-4
21 00 00 00-00: Underwater
00 21 00 00-20: Overworld
00 00 21 00-40: Underground
00 00 00 21-60: Castle
22: Cardridge RAM
22 00 00 00-00: Underwater
00 22 00 00-20: Overworld
00 00 22 00-40: Underground
00 00 00 22-60: Castle
23: Collision Datablock
23 00 00 00-00: Underwater
00 23 00 00-20: Overworld
00 00 23 00-40: Underground
00 00 00 23-60: Castle
24: 137-1
24 00 00 00-00: Underwater
00 24 00 00-20: Overworld
00 00 24 00-40: Underground
00 00 00 24-60: Castle
25: Blackout
26: 64-1
26 00 00 00-00: Underwater
00 26 00 00-20: Overworld
00 00 26 00-40: Underground
00 00 00 26-60: Castle
27: Blackout
28: Internal NES RAM
28 00 00 00-00: Underwater
00 28 00 00-20: Overworld
00 00 28 00-40: Underground
00 00 00 28-60: Castle
29: T-1
29 00 00 00-00: Underwater
00 29 00 00-20: Overworld
00 00 29 00-40: Underground
00 00 00 29-60: Castle
2A: Blackout
2B: Blackout
2C: E-1
2C 00 00 00-00: Underwater
00 2C 00 00-20: Overworld
00 00 2C 00-40: Underground
00 00 00 2C-60: Castle
2D: 131-1
2D 00 00 00-00: Underwater
00 2D 00 00-20: Overworld
00 00 2D 00-40: Underground
00 00 00 2D-60: Castle
2E: Hallway of Freeze
2E 00 00 00-00: Underwater
00 2E 00 00-20: Overworld
00 00 2E 00-40: Underground
00 00 00 2E-60: Castle
2F: Blackout
30: I/O Port Addresses
30 00 00 00-00: Underwater
00 30 00 00-20: Overworld
00 00 30 00-40: Underground
00 00 00 30-60: Castle
31: 127-1
31 00 00 00-00: Underwater
00 31 00 00-20: Overworld
00 00 31 00-40: Underground
00 00 00 31-60: Castle
32: 59-1
32 00 00 00-00: Underwater
00 32 00 00-20: Overworld
00 00 32 00-40: Underground
00 00 00 32-60: Castle
33: Blackout
34: Internal NES RAM
34 00 00 00-00: Underwater
00 34 00 00-20: Overworld
00 00 34 00-40: Underground
00 00 00 34-60: Castle
35: The Ropes
35 00 00 00-00: Underwater
00 35 00 00-20: Overworld
00 00 35 00-40: Underground
00 00 00 35-60: Castle
36: Blackout
37: Blackout
38: S-2
38 00 00 00-00: Underwater
00 38 00 00-20: Overworld
00 00 38 00-40: Underground
00 00 00 38-60: Castle
39: Internal NES RAM
39 00 00 00-00: Underwater
00 39 00 00-20: Overworld
00 00 39 00-40: Underground
00 00 00 39-60: Castle
3A: 211-3
3A 00 00 00-00: Underwater
00 3A 00 00-20: Overworld
00 00 3A 00-40: Underground
00 00 00 3A-60: Castle
3B: Blackout
3C: New Areas Marker
3C 00 00 00-00: Underwater
00 3C 00 00-20: Overworld
00 00 3C 00-40: Underground
00 00 00 3C-60: Castle
3D: Long L-Pipe Blockade
3D 00 00 00-00: Underwater
00 3D 00 00-20: Overworld
00 00 3D 00-40: Underground
00 00 00 3D-60: Castle
3E: Internal NES RAM
3E 00 00 00-00: Underwater
00 3E 00 00-20: Overworld
00 00 3E 00-40: Underground
00 00 00 3E-60: Castle
3F: Internal NES RAM
3F 00 00 00-00: Underwater
00 3F 00 00-20: Overworld
00 00 3F 00-40: Underground
00 00 00 3F-60: Castle
40: I/O Port Addresses
40 00 00 00-00: Underwater
00 40 00 00-20: Overworld
00 00 40 00-40: Underground
00 00 00 40-60: Castle
41: Blackout
42: Cardridge RAM
42 00 00 00-00: Underwater
00 42 00 00-20: Overworld
00 00 42 00-40: Underground
00 00 00 42-60: Castle
43: I/O Port Addresses
43 00 00 00-00: Underwater
00 43 00 00-20: Overworld
00 00 43 00-40: Underground
00 00 00 43-60: Castle
44: Pipe Blockades Below
44 00 00 00-00: Underwater
00 44 00 00-20: Overworld
00 00 44 00-40 begin_of_the_skype_highlighting 00 44 00-40 end_of_the_skype_highlighting: Underground
00 00 00 44-60: Castle
45: I/O Port Addresses
45 00 00 00-00: Underwater
00 45 00 00-20: Overworld
00 00 45 00-40: Underground
00 00 00 45-60: Castle
46: Castle Wall Pass Part 1
46 00 00 00-00: Underwater
00 46 00 00-20: Overworld
00 00 46 00-40: Underground
00 00 00 46-60: Castle
47: Monochrome Corridors
47 00 00 00-00: Underwater
00 47 00 00-20: Overworld
00 00 47 00-40: Underground
00 00 00 47-60: Castle
48: Unlucky Island Drop
48 00 00 00-00: Underwater
00 48 00 00-20: Overworld
00 00 48 00-40: Underground
00 00 00 48-60: Castle
49: Internal NES RAM
49 00 00 00-00: Underwater
00 49 00 00-20: Overworld
00 00 49 00-40: Underground
00 00 00 49-60: Castle
4A: Internal NES RAM
4A 00 00 00-00: Underwater
00 4A 00 00-20: Overworld
00 00 4A 00-40: Underground
00 00 00 4A-60: Castle
4B: Blackout
4C: Internal NES RAM
4C 00 00 00-00: Underwater
00 4C 00 00-20: Overworld
00 00 4C 00-40: Underground
00 00 00 4C-60: Castle
4D: On Top of Stuff
4D 00 00 00-00: Underwater
00 4D 00 00-20: Overworld
00 00 4D 00-40: Underground
00 00 00 4D-60: Castle
4E: Internal NES RAM
4E 00 00 00-00: Underwater
00 4E 00 00-20: Overworld
00 00 4E 00-40: Underground
00 00 00 4E-60: Castle
4F: Internal NES RAM
4F 00 00 00-00: Underwater
00 4F 00 00-20: Overworld
00 00 4F 00-40: Underground
00 00 00 4F-60: Castle
50: Internal NES RAM
50 00 00 00-00: Underwater
00 50 00 00-20: Overworld
00 00 50 00-40: Underground
00 00 00 50-60: Castle
51: I/O Port Addresses
51 00 00 00-00: Underwater
00 51 00 00-20: Overworld
00 00 51 00-40: Underground
00 00 00 51-60: Castle
52: Internal NES RAM
52 00 00 00-00: Underwater
00 52 00 00-20: Overworld
00 00 52 00-40: Underground
00 00 00 52-60: Castle
53: Castle Wall Pass Part 2
53 00 00 00-00: Underwater
00 53 00 00-20: Overworld
00 00 53 00-40: Underground
00 00 00 53-60: Castle
54: Internal NES RAM
54 00 00 00-00: Underwater
00 54 00 00-20: Overworld
00 00 54 00-40: Underground
00 00 00 54-60: Castle
55: Blackout
56: A Not-So-Average Plain
56 00 00 00-00: Underwater
00 56 00 00-20: Overworld
00 00 56 00-40: Underground
00 00 00 56-60: Castle
57: Internal NES RAM
57 00 00 00-00: Underwater
00 57 00 00-20: Overworld
00 00 57 00-40: Underground
00 00 00 57-60: Castle
58: Internal NES RAM
58 00 00 00-00: Underwater
00 58 00 00-20: Overworld
00 00 58 00-40: Underground
00 00 00 58-60: Castle
59: I/O Port Addresses
59 00 00 00-00: Underwater
00 59 00 00-20: Overworld
00 00 59 00-40: Underground
00 00 00 59-60: Castle
5A: Internal NES RAM
5A 00 00 00-00: Underwater
00 5A 00 00-20: Overworld
00 00 5A 00-40: Underground
00 00 00 5A-60: Castle
5B: Blackout
5C: Internal NES RAM
5C 00 00 00-00: Underwater
00 5C 00 00-20: Overworld
00 00 5C 00-40: Underground
00 00 00 5C-60: Castle
5D: Expansion Modules
5D 00 00 00-00: Underwater
00 5D 00 00-20: Overworld
00 00 5D 00-40: Underground
00 00 00 5D-60: Castle
5E: I/O Port Addresses
5E 00 00 00-00: Underwater
00 5E 00 00-20: Overworld
00 00 5E 00-40: Underground
00 00 00 5E-60: Castle
5F: Another Freeze Hall
5F 00 00 00-00: Underwater
00 5F 00 00-20: Overworld
00 00 5F 00-40: Underground
00 00 00 5F-60: Castle
60: Water Can Stick Out
60 00 00 00-00: Underwater
00 60 00 00-20: Overworld
00 00 60 00-40: Underground
00 00 00 60-60: Castle
61: Lookout Platform
61 00 00 00-00: Underwater
00 61 00 00-20: Overworld
00 00 61 00-40: Underground
00 00 00 61-60: Castle
62: Internal NES RAM
62 00 00 00-00: Underwater
00 62 00 00-20: Overworld
00 00 62 00-40: Underground
00 00 00 62-60: Castle
63: Nighttime Stroll
63 00 00 00-00: Underwater
00 63 00 00-20: Overworld
00 00 63 00-40: Underground
00 00 00 63-60: Castle
64: Blackout
65: Blackout
66: Cardridge RAM
66 00 00 00-00: Underwater
00 66 00 00-20: Overworld
00 00 66 00-40: Underground
00 00 00 66-60: Castle
67: Expansion Modules
67 00 00 00-00: Underwater
00 67 00 00-20: Overworld
00 00 67 00-40: Underground
00 00 00 67-60: Castle
68: What's Mario Doing Up There?
68 00 00 00-00: Underwater
00 68 00 00-20: Overworld
00 00 68 00-40: Underground
00 00 00 68-60: Castle
69: Internal NES RAM
69 00 00 00-00: Underwater
00 69 00 00-20: Overworld
00 00 69 00-40: Underground
00 00 00 69-60: Castle
6A: Mario Walk 'n' Freeze
6A 00 00 00-00: Underwater
00 6A 00 00-20: Overworld
00 00 6A 00-40: Underground
00 00 00 6A-60: Castle
6B: Nighttime in the Mine
6B 00 00 00-00: Underwater
00 6B 00 00-20: Overworld
00 00 6B 00-40: Underground
00 00 00 6B-60: Castle
6C: Internal NES RAM
6C 00 00 00-00: Underwater
00 6C 00 00-20: Overworld
00 00 6C 00-40: Underground
00 00 00 6C-60: Castle
6D: On Top of The 6th Dimension
6D 00 00 00-00: Underwater
00 6D 00 00-20: Overworld
00 00 6D 00-40: Underground
00 00 00 6D-60: Castle
6E: Cardridge RAM
6E 00 00 00-00: Underwater
00 6E 00 00-20: Overworld
00 00 6E 00-40: Underground
00 00 00 6E-60: Castle
6F: Blackout
70: Cardridge RAM
70 00 00 00-00: Underwater
00 70 00 00-20: Overworld
00 00 70 00-40: Underground
00 00 00 70-60: Castle
71: Blackout
72: A Questionable Floor
72 00 00 00-00: Underwater
00 72 00 00-20: Overworld
00 00 72 00-40: Underground
00 00 00 72-60: Castle
73: Blackout
74: I/O Port Addresses
74 00 00 00-00: Underwater
00 74 00 00-20: Overworld
00 00 74 00-40: Underground
00 00 00 74-60: Castle
75: Above the Clouds
75 00 00 00-00: Underwater
00 75 00 00-20: Overworld
00 00 75 00-40: Underground
00 00 00 75-60: Castle
76: To the Springboard!
76 00 00 00-00: Underwater
00 76 00 00-20: Overworld
00 00 76 00-40: Underground
00 00 00 76-60: Castle
77: Blackout
78: I/O Port Addresses
78 00 00 00-00: Underwater
00 78 00 00-20: Overworld
00 00 78 00-40: Underground
00 00 00 78-60: Castle
79: ROPES, ROPES, ROPES!
79 00 00 00-00: Underwater
00 79 00 00-20: Overworld
00 00 79 00-40: Underground
00 00 00 79-60: Castle
7A: Blackout
7B: I/O Port Addresses
7B 00 00 00-00: Underwater
00 7B 00 00-20: Overworld
00 00 7B 00-40: Underground
00 00 00 7B-60: Castle
7C: To Move or Not to Move
7C 00 00 00-00: Underwater
00 7C 00 00-20: Overworld
00 00 7C 00-40: Underground
00 00 00 7C-60: Castle
7D: I/O Port Addresses
7D 00 00 00-00: Underwater
00 7D 00 00-20: Overworld
00 00 7D 00-40: Underground
00 00 00 7D-60: Castle
7E: Buried Treasure
7E 00 00 00-00: Underwater
00 7E 00 00-20: Overworld
00 00 7E 00-40: Underground
00 00 00 7E-60: Castle
7F: Internal NES RAM
7F 00 00 00-00: Underwater
00 7F 00 00-20: Overworld
00 00 7F 00-40: Underground
00 00 00 7F-60: Castle
80: I/O Port Addresses
80 00 00 00-00: Underwater
00 80 00 00-20: Overworld
00 00 80 00-40: Underground
00 00 00 80-60: Castle
81: Brick in the Ground
81 00 00 00-00: Underwater
00 81 00 00-20: Overworld
00 00 81 00-40: Underground
00 00 00 81-60: Castle
82: Cardridge RAM
82 00 00 00-00: Underwater
00 82 00 00-20: Overworld
00 00 82 00-40: Underground
00 00 00 82-60: Castle
83: Blackout
84: Tunnel Ho!
84 00 00 00-00: Underwater
00 84 00 00-20: Overworld
00 00 84 00-40: Underground
00 00 00 84-60: Castle
85: Blackout
86: Internal NES RAM
86 00 00 00-00: Underwater
00 86 00 00-20: Overworld
00 00 86 00-40: Underground
00 00 00 86-60: Castle
87: Groundwater 2
87 00 00 00-00: Underwater
00 87 00 00-20: Overworld
00 00 87 00-40: Underground
00 00 00 87-60: Castle
88: I/O Port Addresses
88 00 00 00-00: Underwater
00 88 00 00-20: Overworld
00 00 88 00-40: Underground
00 00 00 88-60: Castle
89: A Castle Corridor and Stuff
89 00 00 00-00: Underwater
00 89 00 00-20: Overworld
00 00 89 00-40: Underground
00 00 00 89-60: Castle
8A: Cardridge RAM
8A 00 00 00-00: Underwater
00 8A 00 00-20: Overworld
00 00 8A 00-40: Underground
00 00 00 8A-60: Castle
8B: I/O Port Addresses
8B 00 00 00-00: Underwater
00 8B 00 00-20: Overworld
00 00 8B 00-40: Underground
00 00 00 8B-60: Castle
8C: Mario Over Level
8C 00 00 00-00: Underwater
00 8C 00 00-20: Overworld
00 00 8C 00-40: Underground
00 00 00 8C-60: Castle
8D: I/O Port Addresses
8D 00 00 00-00: Underwater
00 8D 00 00-20: Overworld
00 00 8D 00-40: Underground
00 00 00 8D-60: Castle
8E: Lucky Ceiling
8E 00 00 00-00: Underwater
00 8E 00 00-20: Overworld
00 00 8E 00-40: Underground
00 00 00 8E-60: Castle
8F: Two Flags
8F 00 00 00-00: Underwater
00 8F 00 00-20: Overworld
00 00 8F 00-40: Underground
00 00 00 8F-60: Castle
90: The L-Pipe
90 00 00 00-00: Underwater
00 90 00 00-20: Overworld
00 00 90 00-40: Underground
00 00 00 90-60: Castle
91: Internal NES RAM
91 00 00 00-00: Underwater
00 91 00 00-20: Overworld
00 00 91 00-40: Underground
00 00 00 91-60: Castle
92: Halloween Night
92 00 00 00-00: Underwater
00 92 00 00-20: Overworld
00 00 92 00-40: Underground
00 00 00 92-60: Castle
93: I/O Port Addresses
93 00 00 00-00: Underwater
00 93 00 00-20: Overworld
00 00 93 00-40: Underground
00 00 00 93-60: Castle
94: Blackout
95: Mario Mario
95 00 00 00-00: Underwater
00 95 00 00-20: Overworld
00 00 95 00-40: Underground
00 00 00 95-60: Castle
96: Blackout
97: Coin Row; Row of Coins
97 00 00 00-00: Underwater
00 97 00 00-20: Overworld
00 00 97 00-40: Underground
00 00 00 97-60: Castle
98: Internal NES RAM
98 00 00 00-00: Underwater
00 98 00 00-20: Overworld
00 00 98 00-40: Underground
00 00 00 98-60: Castle
99: On Top and Below
99 00 00 00-00: Underwater
00 99 00 00-20: Overworld
00 00 99 00-40: Underground
00 00 00 99-60: Castle
9A: Blackout
9B: Internal NES RAM
9B 00 00 00-00: Underwater
00 9B 00 00-20: Overworld
00 00 9B 00-40: Underground
00 00 00 9B-60: Castle
9C: Internal NES RAM
9C 00 00 00-00: Underwater
00 9C 00 00-20: Overworld
00 00 9C 00-40: Underground
00 00 00 9C-60: Castle
9D: Cardridge RAM
9D 00 00 00-00: Underwater
00 9D 00 00-20: Overworld
00 00 9D 00-40: Underground
00 00 00 9D-60: Castle
9E: Blackout
9F: Cardridge RAM
9F 00 00 00-00: Underwater
00 9F 00 00-20: Overworld
00 00 9F 00-40: Underground
00 00 00 9F-60: Castle
A0: Blackout
A1: Blackout
A2: PAAOOK
A2 00 00 00-00: Underwater
00 A2 00 00-20: Overworld
00 00 A2 00-40: Underground
00 00 00 A2-60: Castle
A3: Internal NES RAM
A3 00 00 00-00: Underwater
00 A3 00 00-20: Overworld
00 00 A3 00-40: Underground
00 00 00 A3-60: Castle
A4: Internal NES RAM
A4 00 00 00-00: Underwater
00 A4 00 00-20: Overworld
00 00 A4 00-40: Underground
00 00 00 A4-60: Castle
A5: Blackout
A6: Fly or Die
A6 00 00 00-00: Underwater
00 A6 00 00-20: Overworld
00 00 A6 00-40: Underground
00 00 00 A6-60: Castle
A7: Internal NES RAM
A7 00 00 00-00: Underwater
00 A7 00 00-20: Overworld
00 00 A7 00-40: Underground
00 00 00 A7-60: Castle
A8: Blackout
A9: COINS, COINS, COINS!
A9 00 00 00-00: Underwater
00 A9 00 00-20: Overworld
00 00 A9 00-40: Underground
00 00 00 A9-60: Castle
AA: Internal NES RAM
AA 00 00 00-00: Underwater
00 AA 00 00-20: Overworld
00 00 AA 00-40: Underground
00 00 00 AA-60: Castle
AB: Blackout
AC: Eternity Walker
AC 00 00 00-00: Underwater
00 AC 00 00-20: Overworld
00 00 AC 00-40: Underground
00 00 00 AC-60: Castle
AD: Cardridge RAM
AD 00 00 00-00: Underwater
00 AD 00 00-20: Overworld
00 00 AD 00-40: Underground
00 00 00 AD-60: Castle
AE: Blackout
AF: Cardridge RAM
AF 00 00 00-00: Underwater
00 AF 00 00-20: Overworld
00 00 AF 00-40: Underground
00 00 00 AF-60: Castle
B0: Blackout
B1: Cloudy Ropes
B1 00 00 00-00: Underwater
00 B1 00 00-20: Overworld
00 00 B1 00-40: Underground
00 00 00 B1-60: Castle
B2: Blackout
B3: Internal NES RAM
B3 00 00 00-00: Underwater
00 B3 00 00-20: Overworld
00 00 B3 00-40: Underground
00 00 00 B3-60: Castle
B4: Internal NES RAM
B4 00 00 00-00: Underwater
00 B4 00 00-20: Overworld
00 00 B4 00-40: Underground
00 00 00 B4-60: Castle
B5: Cardridge RAM
B5 00 00 00-00: Underwater
00 B5 00 00-20: Overworld
00 00 B5 00-40: Underground
00 00 00 B5-60: Castle
B6: I/O Port Addresses
B6 00 00 00-00: Underwater
00 B6 00 00-20: Overworld
00 00 B6 00-40: Underground
00 00 00 B6-60: Castle
B7: Walkin'
B7 00 00 00-00: Underwater
00 B7 00 00-20: Overworld
00 00 B7 00-40: Underground
00 00 00 B7-60: Castle
B8: I/O Port Addresses
B8 00 00 00-00: Underwater
00 B8 00 00-20: Overworld
00 00 B8 00-40: Underground
00 00 00 B8-60: Castle
B9: One Rope Too Many
B9 00 00 00-00: Underwater
00 B9 00 00-20: Overworld
00 00 B9 00-40: Underground
00 00 00 B9-60: Castle
BA: Level Lifter
BA 00 00 00-00: Underwater
00 BA 00 00-20: Overworld
00 00 BA 00-40: Underground
00 00 00 BA-60: Castle
BB: Pit Lifter
BB 00 00 00-00: Underwater
00 BB 00 00-20: Overworld
00 00 BB 00-40: Underground
00 00 00 BB-60: Castle
BC: I/O Port Addresses
BC 00 00 00-00: Underwater
00 BC 00 00-20: Overworld
00 00 BC 00-40: Underground
00 00 00 BC-60: Castle
BD: Use Game Genie Code NNPLAK
BD 00 00 00-00: Underwater
00 BD 00 00-20: Overworld
00 00 BD 00-40: Underground
00 00 00 BD-60: Castle
BE: Blackout
BF: Internal NES RAM
BF 00 00 00-00: Underwater
00 BF 00 00-20: Overworld
00 00 BF 00-40: Underground
00 00 00 BF-60: Castle
C0: Cardridge RAM
C0 00 00 00-00: Underwater
00 C0 00 00-20: Overworld
00 00 C0 00-40: Underground
00 00 00 C0-60: Castle
C1: I/O Port Addresses
C1 00 00 00-00: Underwater
00 C1 00 00-20: Overworld
00 00 C1 00-40: Underground
00 00 00 C1-60: Castle
C2: Internal NES RAM
C2 00 00 00-00: Underwater
00 C2 00 00-20: Overworld
00 00 C2 00-40: Underground
00 00 00 C2-60: Castle
C3: Blackout
C4: Cardridge RAM
C4 00 00 00-00: Underwater
00 C4 00 00-20: Overworld
00 00 C4 00-40: Underground
00 00 00 C4-60: Castle
C5: Internal NES RAM
C5 00 00 00-00: Underwater
00 C5 00 00-20: Overworld
00 00 C5 00-40: Underground
00 00 00 C5-60: Castle
C6: Internal NES RAM
C6 00 00 00-00: Underwater
00 C6 00 00-20: Overworld
00 00 C6 00-40: Underground
00 00 00 C6-60: Castle
C7: Internal NES RAM
C7 00 00 00-00: Underwater
00 C7 00 00-20: Overworld
00 00 C7 00-40: Underground
00 00 00 C7-60: Castle
C8: Cardridge RAM
C8 00 00 00-00: Underwater
00 C8 00 00-20: Overworld
00 00 C8 00-40: Underground
00 00 00 C8-60: Castle
C9: Blackout
CA: Blackout
CB: Tunnel Blockade
CB 00 00 00-00: Underwater
00 CB 00 00-20: Overworld
00 00 CB 00-40: Underground
00 00 00 CB-60: Castle
CC: Cardridge RAM
CC 00 00 00-00: Underwater
00 CC 00 00-20: Overworld
00 00 CC 00-40: Underground
00 00 00 CC-60: Castle
CD: I/O Port Addresses
CD 00 00 00-00: Underwater
00 CD 00 00-20: Overworld
00 00 CD 00-40: Underground
00 00 00 CD-60: Castle
CE: Castle'd
CE 00 00 00-00: Underwater
00 CE 00 00-20: Overworld
00 00 CE 00-40: Underground
00 00 00 CE-60: Castle
CF: Flagpole Evasion
CF 00 00 00-00: Underwater
00 CF 00 00-20: Overworld
00 00 CF 00-40: Underground
00 00 00 CF-60: Castle
D0: Platform Hopping Super Duper Speshul Edishin
D0 00 00 00-00: Underwater
00 D0 00 00-20: Overworld
00 00 D0 00-40: Underground
00 00 00 D0-60: Castle
D1: Internal NES RAM
D1 00 00 00-00: Underwater
00 D1 00 00-20: Overworld
00 00 D1 00-40: Underground
00 00 00 D1-60: Castle
D2: Internal NES RAM
D2 00 00 00-00: Underwater
00 D2 00 00-20: Overworld
00 00 D2 00-40: Underground
00 00 00 D2-60: Castle
D3: Neighboring Tunnel
D3 00 00 00-00: Underwater
00 D3 00 00-20: Overworld
00 00 D3 00-40: Underground
00 00 00 D3-60: Castle
D4: Cardridge RAM
D4 00 00 00-00: Underwater
00 D4 00 00-20: Overworld
00 00 D4 00-40: Underground
00 00 00 D4-60: Castle
D5: Stuff Ahead!
D5 00 00 00-00: Underwater
00 D5 00 00-20: Overworld
00 00 D5 00-40: Underground
00 00 00 D5-60: Castle
D6: Cool Things to the Right!
D6 00 00 00-00: Underwater
00 D6 00 00-20: Overworld
00 00 D6 00-40: Underground
00 00 00 D6-60: Castle
D7: I/O Port Addresses
D7 00 00 00-00: Underwater
00 D7 00 00-20: Overworld
00 00 D7 00-40: Underground
00 00 00 D7-60: Castle
D8: Cardridge RAM
D8 00 00 00-00: Underwater
00 D8 00 00-20: Overworld
00 00 D8 00-40: Underground
00 00 00 D8-60: Castle
D9: The Tall Bullet Bill Shooter
D9 00 00 00-00: Underwater
00 D9 00 00-20: Overworld
00 00 D9 00-40: Underground
00 00 00 D9-60: Castle
DA: I/O Port Addresses
DA 00 00 00-00: Underwater
00 DA 00 00-20: Overworld
00 00 DA 00-40: Underground
00 00 00 DA-60: Castle
DB: SUICIDE!
DB 00 00 00-00: Underwater
00 DB 00 00-20: Overworld
00 00 DB 00-40: Underground
00 00 00 DB-60: Castle
DC: The Clouds at Washington D.C.
DC 00 00 00-00: Underwater
00 DC 00 00-20: Overworld
00 00 DC 00-40: Underground
00 00 00 DC-60: Castle
DD: Internal NES RAM
DD 00 00 00-00: Underwater
00 DD 00 00-20: Overworld
00 00 DD 00-40: Underground
00 00 00 DD-60: Castle
DE: Internal NES RAM
DE 00 00 00-00: Underwater
00 DE 00 00-20: Overworld
00 00 DE 00-40: Underground
00 00 00 DE-60: Castle
DF: Internal NES RAM
DF 00 00 00-00: Underwater
00 DF 00 00-20: Overworld
00 00 DF 00-40: Underground
00 00 00 DF-60: Castle
E0: Sprite Page
E0 00 00 00-00: Underwater
00 E0 00 00-20: Overworld
00 00 E0 00-40: Underground
00 00 00 E0-60: Castle
E1: I/O Port Addresses
E1 00 00 00-00: Underwater
00 E1 00 00-20: Overworld
00 00 E1 00-40: Underground
00 00 00 E1-60: Castle
E2: Sprite Page
E2 00 00 00-00: Underwater
00 E2 00 00-20: Overworld
00 00 E2 00-40: Underground
00 00 00 E2-60: Castle
E3: Blackout
E4: Cardridge RAM
E4 00 00 00-00: Underwater
00 E4 00 00-20: Overworld
00 00 E4 00-40: Underground
00 00 00 E4-60: Castle
E5: The L-Pipe is Ahead
E5 00 00 00-00: Underwater
00 E5 00 00-20: Overworld
00 00 E5 00-40: Underground
00 00 00 E5-60: Castle
E6: Pipez
E6 00 00 00-00: Underwater
00 E6 00 00-20: Overworld
00 00 E6 00-40: Underground
00 00 00 E6-60: Castle
E7: Blackout
E8: Nighttime in the Mine 2
E8 00 00 00-00: Underwater
00 E8 00 00-20: Overworld
00 00 E8 00-40: Underground
00 00 00 E8-60: Castle
E9: Blackout
EA: Blue Corridor
EA 00 00 00-00: Underwater
00 EA 00 00-20: Overworld
00 00 EA 00-40: Underground
00 00 00 EA-60: Castle
EB: Greyzone
EB 00 00 00-00: Underwater
00 EB 00 00-20: Overworld
00 00 EB 00-40: Underground
00 00 00 EB-60: Castle
EC: Greyzone 2
EC 00 00 00-00: Underwater
00 EC 00 00-20: Overworld
00 00 EC 00-40: Underground
00 00 00 EC-60: Castle
ED: Internal NES RAM
ED 00 00 00-00: Underwater
00 ED 00 00-20: Overworld
00 00 ED 00-40: Underground
00 00 00 ED-60: Castle
EE: Jumping for Joy
EE 00 00 00-00: Underwater
00 EE 00 00-20: Overworld
00 00 EE 00-40: Underground
00 00 00 EE-60: Castle
EF: Cardridge RAM
EF 00 00 00-00: Underwater
00 EF 00 00-20: Overworld
00 00 EF 00-40: Underground
00 00 00 EF-60: Castle
F0: Stuck Up
F0 00 00 00-00: Underwater
00 F0 00 00-20: Overworld
00 00 F0 00-40: Underground
00 00 00 F0-60: Castle
F1: Internal NES RAM
F1 00 00 00-00: Underwater
00 F1 00 00-20: Overworld
00 00 F1 00-40: Underground
00 00 00 F1-60: Castle
F2: Blackout
F3: Blackout
F4: Cardridge RAM
F4 00 00 00-00: Underwater
00 F4 00 00-20: Overworld
00 00 F4 00-40: Underground
00 00 00 F4-60: Castle
F5: Bridge Blockade
F5 00 00 00-00: Underwater
00 F5 00 00-20: Overworld
00 00 F5 00-40: Underground
00 00 00 F5-60: Castle
F6: Internal NES RAM
F6 00 00 00-00: Underwater
00 F6 00 00-20: Overworld
00 00 F6 00-40: Underground
00 00 00 F6-60: Castle
F7: Internal NES RAM
F7 00 00 00-00: Underwater
00 F7 00 00-20: Overworld
00 00 F7 00-40: Underground
00 00 00 F7-60: Castle
F8: Blackout
F9: Sprite Page
F9 00 00 00-00: Underwater
00 F9 00 00-20: Overworld
00 00 F9 00-40: Underground
00 00 00 F9-60: Castle
FA: Questionable Platform
FA 00 00 00-00: Underwater
00 FA 00 00-20: Overworld
00 00 FA 00-40: Underground
00 00 00 FA-60: Castle
FB: Internal NES RAM
FB 00 00 00-00: Underwater
00 FB 00 00-20: Overworld
00 00 FB 00-40: Underground
00 00 00 FB-60: Castle
FC: Internal NES RAM
FC 00 00 00-00: Underwater
00 FC 00 00-20: Overworld
00 00 FC 00-40: Underground
00 00 00 FC-60: Castle
FD: Whoops!
FD 00 00 00-00: Underwater
00 FD 00 00-20: Overworld
00 00 FD 00-40: Underground
00 00 00 FD-60: Castle
FE: Stupid Pipe!
FE 00 00 00-00: Underwater
00 FE 00 00-20: Overworld
00 00 FE 00-40: Underground
00 00 00 FE-60: Castle
FF: Grand Finale
FF 00 00 00-00: Underwater
00 FF 00 00-20: Overworld
00 00 FF 00-40: Underground
00 00 00 FF-60: Castle
---LEVEL HEADERS---
(The first 2 bytes of an Area indicate the level header.)
FIRST BYTE
(The first byte of an Area controls how Mario starts the levels and what some of the background is.)
00: Time-Up from the top of the screen (spawning at the top of the screen on blocks triggers Traps, Traps are not affected by Time-Ups).
01: Groundwater Time-Up from the top of the screen.
02: Castle Wall Time-Up from the top of the screen.
03: Row 0 Time-Up (Row 0 is the top of the screen).
04: Row 0 Nighttime Time-Up.
05: Row 0 White Time-Up.
06: Row 0 Nighttime Time-Up.
07: Row 0 Grey Time-Up.
08: Row 2 Time-Up (spawning inside blocks at Row 2 triggers Semi-Traps).
09: Row 2 Groundwater Time-Up.
0A: Row 2 Castle Wall Time-Up.
0B: Row 2 Time-Up.
0C: Row 2 Nighttime Time-Up.
0D: Row 2 White Time-Up.
0E: Row 2 Nighttime Time-Up.
0F: Row 2 Grey Time-Up.
10: Row D Time-Up (Row D is the height where Mario starts on normal levels.)
11: Row D Groundwater Time-Up.
12: Row D Castle Wall Time-Up.
13: Row D Time-Up.
14: Row D Nighttime Time-Up.
15: Row D White Time-Up.
16: Row D Nighttime Time-Up.
17: Row D Grey Time-Up.
18: Row 5 Time-Up.
19: Row 5 Groundwater Time-Up.
1A: Row 5 Castle Wall Time-Up.
1B: Row 5 Time-Up.
1C: Row 5 Nighttime Time-Up.
1D: Row 5 White Time-Up.
1E: Row 5 Nighttime Time-Up.
1F: Row 5 Grey Time-Up.
20 to 2F: Repeats of 00 to 07.
30: Row D Walking Mario.
31: Row D Groundwater Walking Mario.
32: Row D Castle Wall Walking Mario.
33: Row D Walking Mario.
34: Row D Nighttime Walking Mario.
35: Row D White Walking Mario.
36: Row D Nighttime Walking Mario.
37: Row D Grey Walking Mario.
38 to 3F: Repeats of 30 to 37.
40: Row 0.
41: Row 0 Groundwater.
42: Row 0 Castle Wall.
43: Row 0.
44: Row 0 Nighttime.
45: Row 0 White.
46: Row 0 Nighttime.
47: Row 0 Grey.
48: Row 2.
49: Row 2 Groundwater.
4A: Row 2 Castle Wall.
4B: Row 2.
4C: Row 2 Nighttime.
4D: Row 2 White.
4E: Row 2 Nighttime.
4F: Row 2 Grey.
50: Row D (This is the most commonly used starting method).
51: Row D Groundwater.
52: Row D Castle Wall.
53: Row D.
54: Row D Nighttime.
55: Row D White.
56: Row D Nighttime.
57: Row D Grey.
58: Row 5.
59: Row 5 Groundwater.
5A: Row 5 Castle Wall.
5B: Row 5.
5C: Row 5 Nighttime.
5D: Row 5 White.
5E: Row 5 Nighttime.
5F: Row 5 Grey.
60 to 6F: Repeats of 40 to 47.
70 to 7F: Repeats of 30 to 37.
80 to AF: Repeats of 40 to 5F with 300 Time.
B0 to BF: Repeats of 30 to 37.
C0 to EF: Repeats of 40 to 5F with 200 Time.
F0 to FF: Repeats of 30 to 37.
SECOND BYTE
(The second byte of an Area controls what the Framework is, what the rest of the background is, if the platforms are mushrooms and if the level is made of clouds or not.)
Format:
(Byte's Hex Number): Blocks((How Many Rows of Blocks)),Background
00: None,None
01: Ground(2),None
02: Ground(2) and Ceiling(1),None
03: Ground(2) and Ceiling(3),None
04: Ground(2) and Ceiling(4),None
05: Ground(2) and Ceiling(8),None
06: Ground(5) and Ceiling(1),None
07: Ground(5) and Ceiling(3),None
08: Ground(5) and Ceiling(4),None
09: Ground(6) and Ceiling(1),None
0A: Ceiling(1),None
0B: Ground(6) and Ceiling(4),None
0C: Ground(9) and Ceiling(1),None
0D: Ground(2) Middle(5) and Ceiling(1),None
0E: Ground(2) Middle(4) and Ceiling(1),None
0F: Full,None
10: None,Clouds
11: Ground(2),Clouds
12: Ground(2) and Ceiling(1),Clouds
13: Ground(2) and Ceiling(3),Clouds
14: Ground(2) and Ceiling(4),Clouds
15: Ground(2) and Ceiling(8),Clouds
16: Ground(5) and Ceiling(1),Clouds
17: Ground(5) and Ceiling(3),Clouds
18: Ground(5) and Ceiling(4),Clouds
19: Ground(6) and Ceiling(1),Clouds
1A: Ceiling(1),Clouds
1B: Ground(6) and Ceiling(4),Clouds
1C: Ground(9) and Ceiling(1),Clouds
1D: Ground(2) Middle(5) and Ceiling(1),Clouds
1E: Ground(2) Middle(4) and Ceiling(1),Clouds
1F: Full,Clouds
20: None,Mountains Bushes and Clouds
21: Ground(2),Mountains Bushes and Clouds
22: Ground(2) and Ceiling(1),Mountains Bushes and Clouds
23: Ground(2) and Ceiling(3),Mountains Bushes and Clouds
24: Ground(2) and Ceiling(4),Mountains Bushes and Clouds
25: Ground(2) and Ceiling(8),Mountains Bushes and Clouds
26: Ground(5) and Ceiling(1),Mountains Bushes and Clouds
27: Ground(5) and Ceiling(3),Mountains Bushes and Clouds
28: Ground(5) and Ceiling(4),Mountains Bushes and Clouds
29: Ground(6) and Ceiling(1),Mountains Bushes and Clouds
2A: Ceiling(1),Mountains Bushes and Clouds
2B: Ground(6) and Ceiling(4),Mountains Bushes and Clouds
2C: Ground(9) and Ceiling(1),Mountains Bushes and Clouds
2D: Ground(2) Middle(5) and Ceiling(1),Mountains Bushes and Clouds
2E: Ground(2) Middle(4) and Ceiling(1),Mountains Bushes and Clouds
2F: Full,Mountains Bushes and Clouds
30: None,Fences and Clouds
31: Ground(2),Fences and Clouds
32: Ground(2) and Ceiling(1),Fences and Clouds
33: Ground(2) and Ceiling(3),Fences and Clouds
34: Ground(2) and Ceiling(4),Fences and Clouds
35: Ground(2) and Ceiling(8),Fences and Clouds
36: Ground(5) and Ceiling(1),Fences and Clouds
37: Ground(5) and Ceiling(3),Fences and Clouds
38: Ground(5) and Ceiling(4),Fences and Clouds
39: Ground(6) and Ceiling(1),Fences and Clouds
3A: Ceiling(1),Fences and Clouds
3B: Ground(6) and Ceiling(4),Fences and Clouds
3C: Ground(9) and Ceiling(1),Fences and Clouds
3D: Ground(2) Middle(5) and Ceiling(1),Fences and Clouds
3E: Ground(2) Middle(4) and Ceiling(1),Fences and Clouds
3F: Full,Fences and Clouds
40 to 7F: Repeats 00 to 3F but the Islands become Mushroom Platforms.
80 to BF: Repeats 00 to 3F but the Islands become Bullet Bill Shooters.
C0 to FF: Cloud level versions of 00 to 3F.
-
MyNameIsKooky
- Rainbow Spirit Master
- Posts: 9711
- Joined: Mon Dec 01, 2008 10:18 pm
-
MyNameIsKooky
- Rainbow Spirit Master
- Posts: 9711
- Joined: Mon Dec 01, 2008 10:18 pm
-
MyNameIsKooky
- Rainbow Spirit Master
- Posts: 9711
- Joined: Mon Dec 01, 2008 10:18 pm